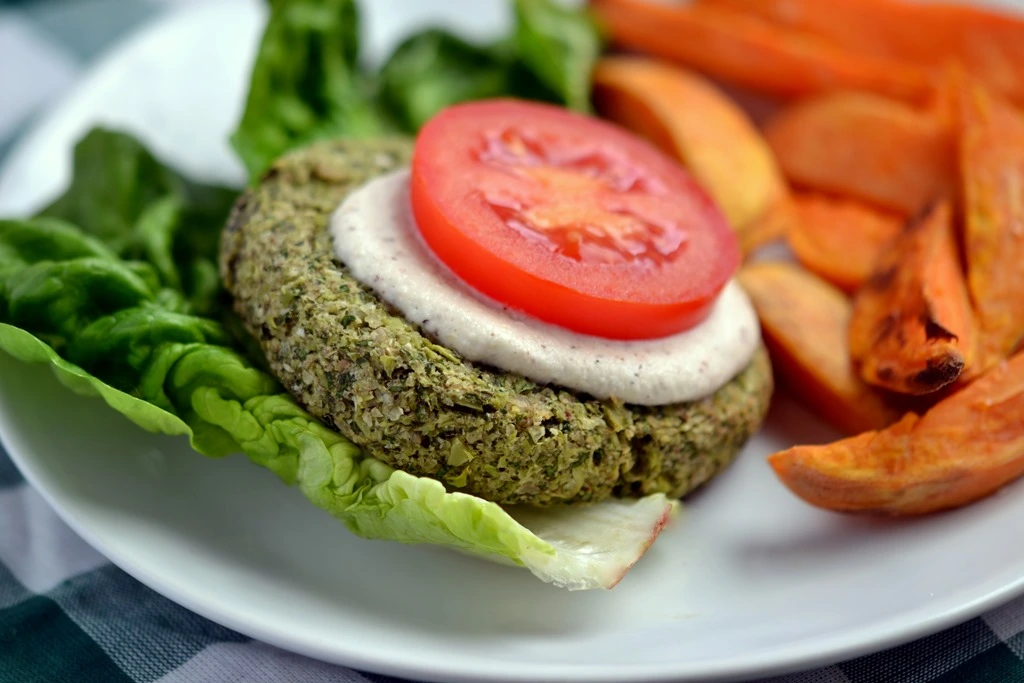
Green Power Burgers

I hope you love green foods as much as me! The colour alone makes me happy but they’re of course full of good nutrients to make you feel good physically too. You don’t have to eat a leafy salad to get your greenery in if that’s not your cup of tea. Try my “Green Power Burgers”! Tasty and satisfying and made with only whole foods.

Green Power Burgers (GF)

You won’t find the recipe here today but please pop over to Ricki Heller’s site where I’m guest posting. Ricki is one of my all-time favourite bloggers and recipe-developers so I’m particularly pleased to be sharing my recipe over there. I’d love your support and comments there! Thank you.

Green Power Burgers (GF)

If you’re new to Coconut and Berries, Please sign up for email updates and join me elsewhere: I’m on Facebook, Pinterest, Instagram (@coconutandberries), Google + and Twitter!

Tempeh & Cauliflower Pasanda

Tempeh & Cauliflower Pasanda

After eating lots of raw food and cold salads recently, I was in the mood for a rich, warming dish.

In the Western world we use the word “curry” to mean virtually anything in a sauce with spices but it does seem a shame to lump everything together and forget that there are actually so many different dishes with flavours unique to their respective cultures. I have a few “curries” on Coconut and Berries:

Sweet Potato, Spinach & Coconut Dahl

Lemony Lentil, Potato & Pea Curry

Thai Tempeh & Vegetable Red Curry

Ethiopian Yellow Split Pea Butternut Stew

spanning Indian-style dishes, Thai, and Ethiopian. And today I’ve got another, completely different one.

Tempeh & Cauliflower Pasanda

I tend to favour South Indian recipes as they’re usually vegetarian by default but Pasanda is a popular North Indian and Pakistani dish. Typically lamb or chicken, cooked in a thick sauce made from a blend of cream, almonds and spices.

I’ve of course veganized it, using chunks of meaty tempeh to replace the lamb and non-dairy yogurt instead of the cream. The result was a wonderfully mild curry with a deliciously nutty and creamy sauce. This one is perfect for families as it’s so lightly spiced, but if you’re not feeding children go ahead and kick up the heat to your liking.

Tempeh & Cauliflower Pasanda

Tempeh & Cauliflower Pasanda

(Adapted from Waitrose magazine)

For the Tempeh:

2T Apple cider vinegar
2T Tamari
2T Water
1t Minced fresh ginger
I 225g/8oz pkg Tempeh, cubed

For the Pasanda:
1T Coconut/Olive oil
1 Medium onion, roughly chopped
1 Small head of cauliflower, broken into small florets (3-4C)
1 Red Chili, minced
2 Cloves of garlic
2 Green Cardamom Pods, Bashed
2t Ground Turmeric
1t Ground Coriander
1/4t Cinnamon
1C Chopped Tomatoes (canned or fresh)
1C Ground Almonds
2C Unsweetened non-dairy yogurt (UK readers, I recommend Sojade organic soy yogurt rather than a thick coconut yogurt like Coyo which would make this too rich. OR, simply use less)
1C Vegetable Broth
Salt & Pepper, to taste
Juice of 1 lime
Handful of fresh coriander, roughly chopped

Whisk together the first four ingredients and toss the tempeh in this mixture. Leave for 30 minutes to marinade.

Heat the oil in a large pan over medium-high heat. Add the tempeh and sauté for approx 5 minutes until lightly browned on all sides. Add the onion, cauliflower and chili and cook for another 5 minutes, until the onion has softened.

Add the garlic and spices and cook, stirring, for a minute. Add the tomatoes, yogurt, broth, salt and pepper and stir until everything is coated.

Cover and simmer for 15 minutes, stirring from time to time to ensure it’s not sticking. You may need to add more broth. The cauliflower should be tender and the sauce thickened. Remove the cardamom pods (if you can find them!), add the lime juice and scatter with fresh coriander and extra chili (if desired).

Serve with flatbread (I adapted this grain-free flatbread recipe) or brown rice

Serves 6

Tempeh & Cauliflower Pasanda

Do you have a favourite curry?

If you’re new to Coconut and Berries, Please sign up for email updates and join me elsewhere: I’m on Facebook, Pinterest, Instagram (@coconutandberries), Google + and Twitter!
Super Sauerkraut Slaw

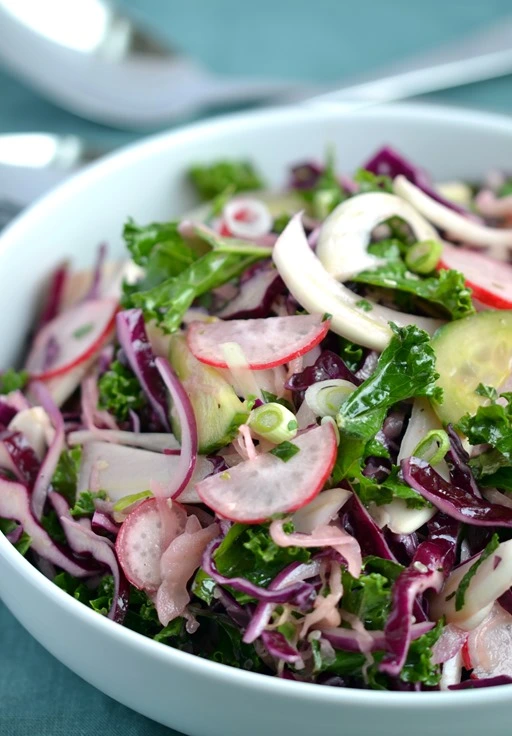
Super Sauerkraut Slaw

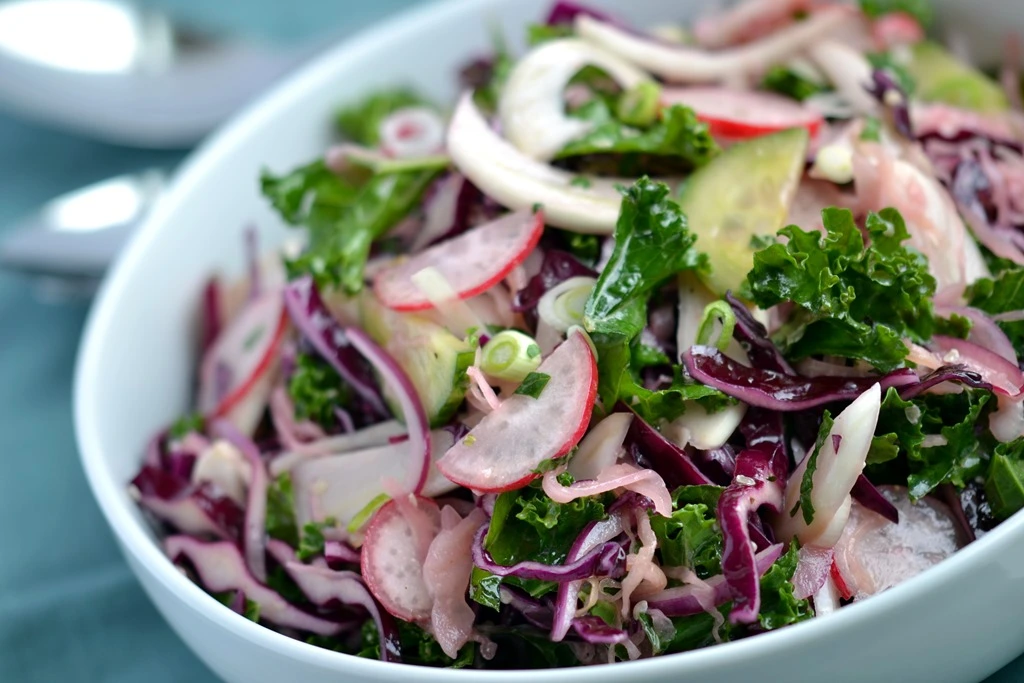
Yes I do already have slaw recipes on the blog…My Cabbage, Apple & Pomegranate Salad with Ginger-Almond Dressing and my Asian-style Cabbage Slaw. What can I say? I like cabbage!

It’s another vegetable that doesn’t get much positive attention but I’m sure that’s because people have been fed it either boiled until it’s grey and lifeless, or in a coleslaw drowned in mayonnaise, rather than crunchy and vibrant as it is in a slaw.

Super Sauerkraut Slaw

I hope I’ve convinced you because this salad has a double dose of cabbage! As well as the shredded red cabbage I’ve added a good scoop of raw sauerkraut to the mix too. There’s been a lot of buzz about fermented foods over recent months and sauerkraut falls into this category. Made from just cabbage and salt and left to ferment it’s teeming with good bacteria which we need to keep our digestive systems in balance. A happy tummy is so important as digestive health plays a key role in every aspect of the body’s functions.

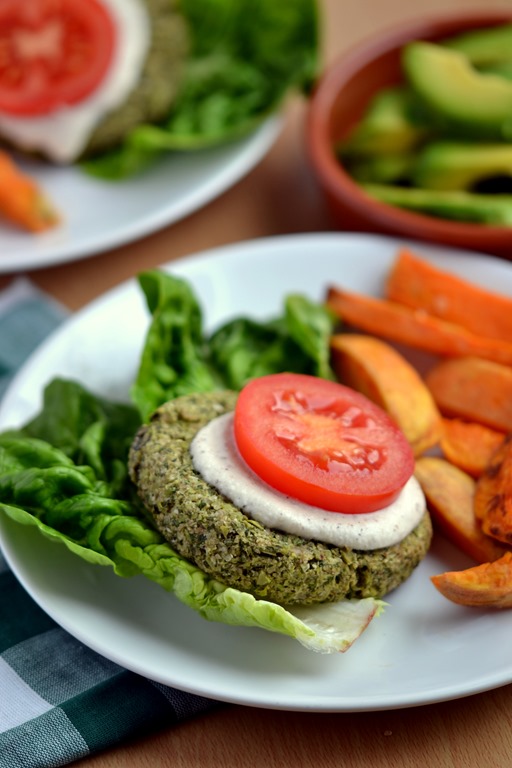
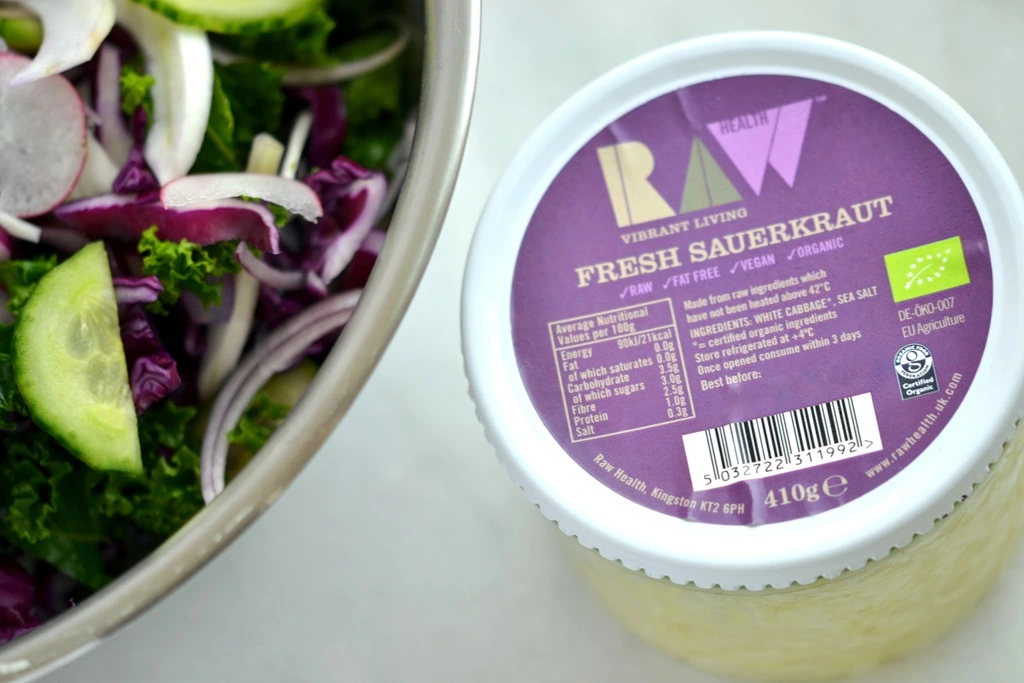
I’ve been using the variety pictured above from Raw Health but should really start making my own as it’s so easy and cheap. If you are going to buy it make sure you get the unpasteurized kind (found in the refrigerated section) if you want the health benefits.

Super Sauerkraut Slaw

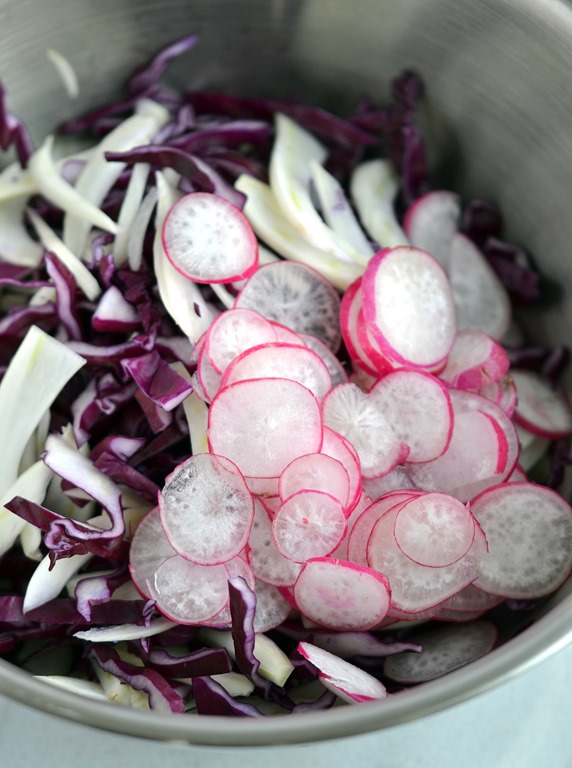
I threw in lots of other vegetables to this slaw for a real veg-fest! Cooling cucumber and radish, fennel for that tasty bite, kale for the all-important green factor and a large handful of fresh mint. It was wonderfully refreshing.

Super Sauerkraut Slaw:

1/2 Small head red cabbage, thinly sliced
1C (packed) Chopped kale
1 Fennel bulb, trimmed and thinly sliced
1/4 Red Onion, thinly sliced
1/2C Sliced radishes
1/2 Medium cucumber, thinly sliced
3/4C Raw, unpasteurized sauerkraut, well drained
2-3 Green onions, sliced
Large handful of roughly chopped mint
3T Olive oil
2T Apple cider vinegar
1T Agave nectar (or other liquid sweetener, e.g. maple syrup, yacon syrup, etc.)
1/2T Dijon mustard
Salt and pepper, to taste

Toss together all the vegetables in large bowl. Whisk the dressing ingredients in a small bowl and pour over the salad. Toss well. The flavour is best after leaving this salad to sit for a few hours so the vegetables can soak up the flavours and soften slightly.

Super Sauerkraut Slaw

Cabbage, yay or nay?

If you’re new to Coconut and Berries, Please sign up for email updates and join me elsewhere: I’m on Facebook, Pinterest, Instagram (@coconutandberries), Google + and Twitter!

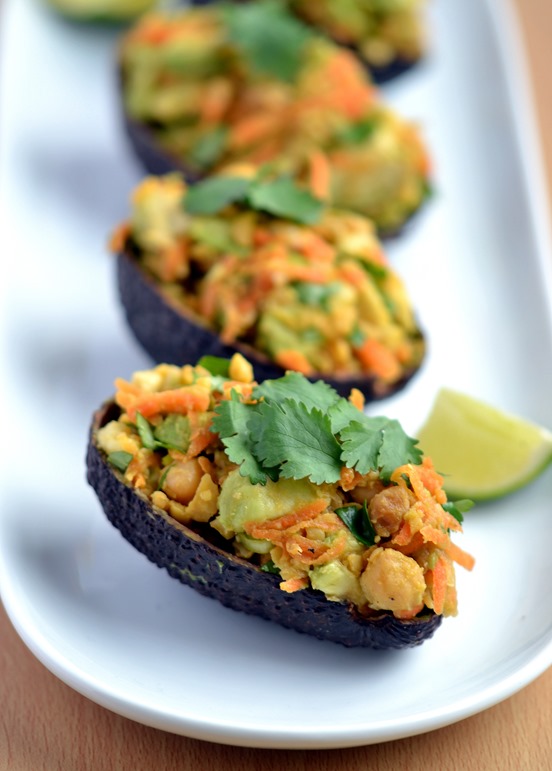
Chickpea Salad Stuffed Avocados

Chickpea Salad Stuffed Avocados

Gosh, two weeks into January already! How time flies. How is everyone doing on their goals for the New Year? Hopefully if you have made resolutions then they’re healthy and realistic Smile.

I like to think I eat pretty well most of the time but finding what makes me feel best is definitely a journey. If you’ve been reading you’ll know that I’ve been eschewing sugar and sweeteners of any kind for some time now.  I don’t think this will be a permanent change (at least I hope not!) but it has given me the opportunity to assess how much I was eating and realize that, even if the sugar was of the “healthy” kind and a lot of it from fruit, that amount wasn’t working for my body. Some people thrive on lots of fruit but I’ve been feeling better eating more savoury foods and a greater amount of fat and protein.

Chickpea Salad Stuffed Avocados

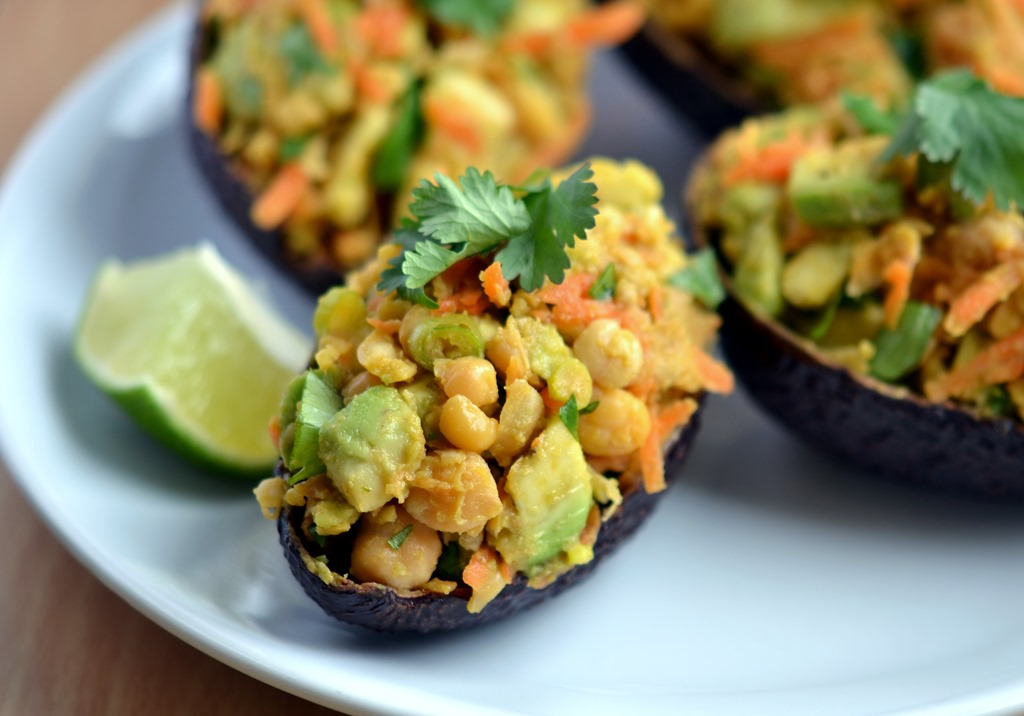
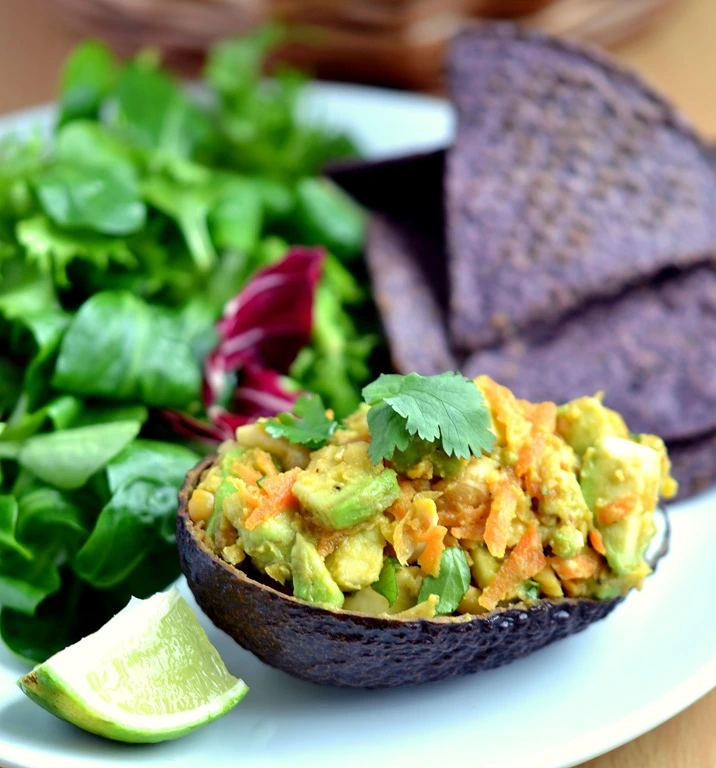
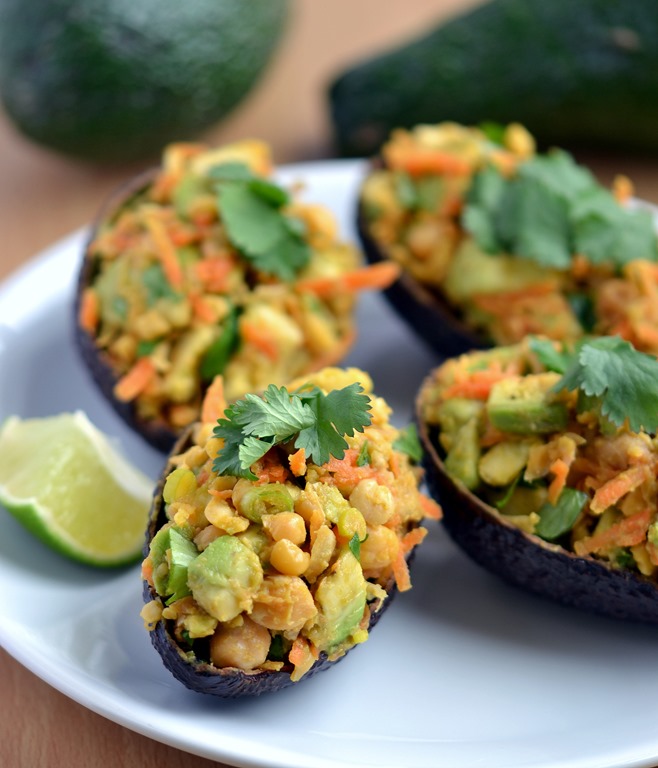
This was a light lunch I put together and exactly the kind of food I’m enjoying at the moment. I’ve been eating probably an avocado a day for the past week! I don’t know how I didn’t use to like them, they’re just so darn delicious. I’m sure you know they’re overflowing with nutrients too.

Along with chickpeas for a concentrated source of protein and several other flavour-boosting ingredients, this salad is tasty, nourishing and sustaining.

I thought the little “boats” looked cute stuffed with the salad but if you’re not concerned with presentation then you could just add a big scoop on top of your salad or eat it as a dip with your favourite crackers or corn chips.

Chickpea Salad Stuffed Avocados

Chickpea Salad Stuffed Avocados:

1C Cooked chickpeas (well-cooked) (RAW option: Use sprouted chickpeas)
1 Small clove of garlic, minced (optional)
1/2C Grated carrot
1 Green onion, thinly sliced
1/2t Olive oil
1 1/2T Lime juice
1t Tamari
Dash of cayenne pepper
Black pepper
1 Large OR 2 small avocados
1/4C Fresh coriander, roughly chopped

Roughly mash the chickpeas in a bowl using a strong fork. I like to leave about half whole. Stir in garlic through to pepper. Slice the avocado(s) in half, remove the pit and scoop out the flesh from each half with a spoon. Dice the avocado flesh into small cubes. Mash half of the avocado into the chickpea mixture then gently fold in the rest along with the fresh coriander.

Spoon the mixture into the empty avocado skins and serve immediately.

Serves 2

I’m sharing this recipe at the “Clean Start” potluck party over at Pure Ella and the weekly link-up, Wellness Weekends.

Chickpea Salad Stuffed Avocados

What fruit or vegetable are you loving right now?

If you’re new to Coconut and Berries, Please sign up for email updates and join me elsewhere: I’m on Facebook, Pinterest, Instagram (@coconutandberries), Google + and Twitter!

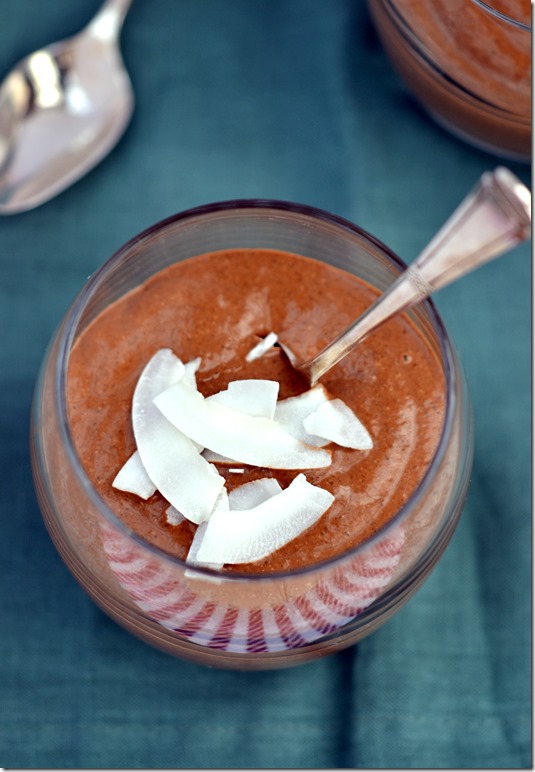
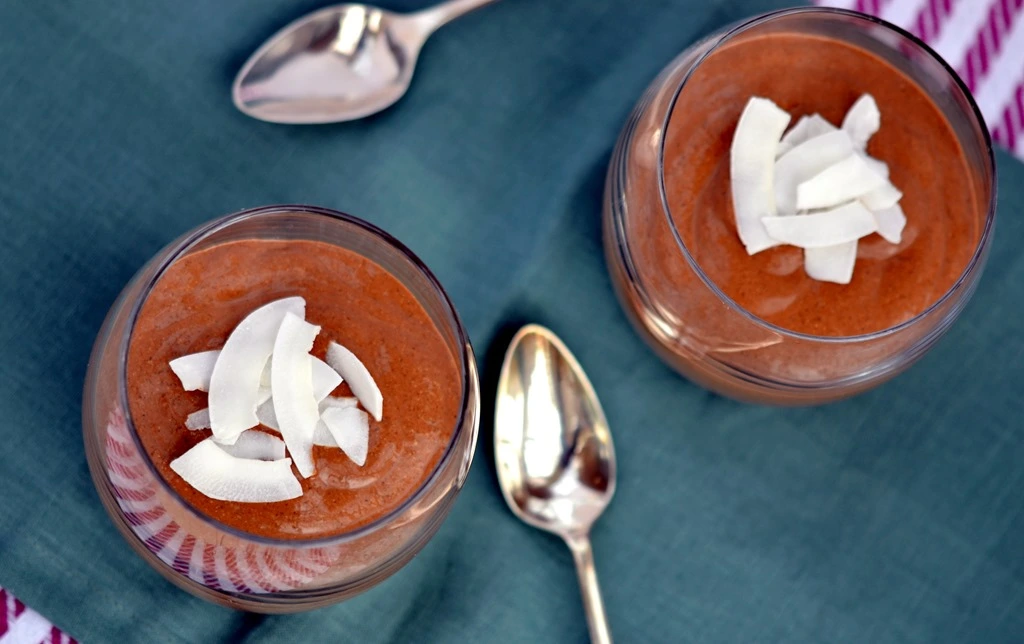
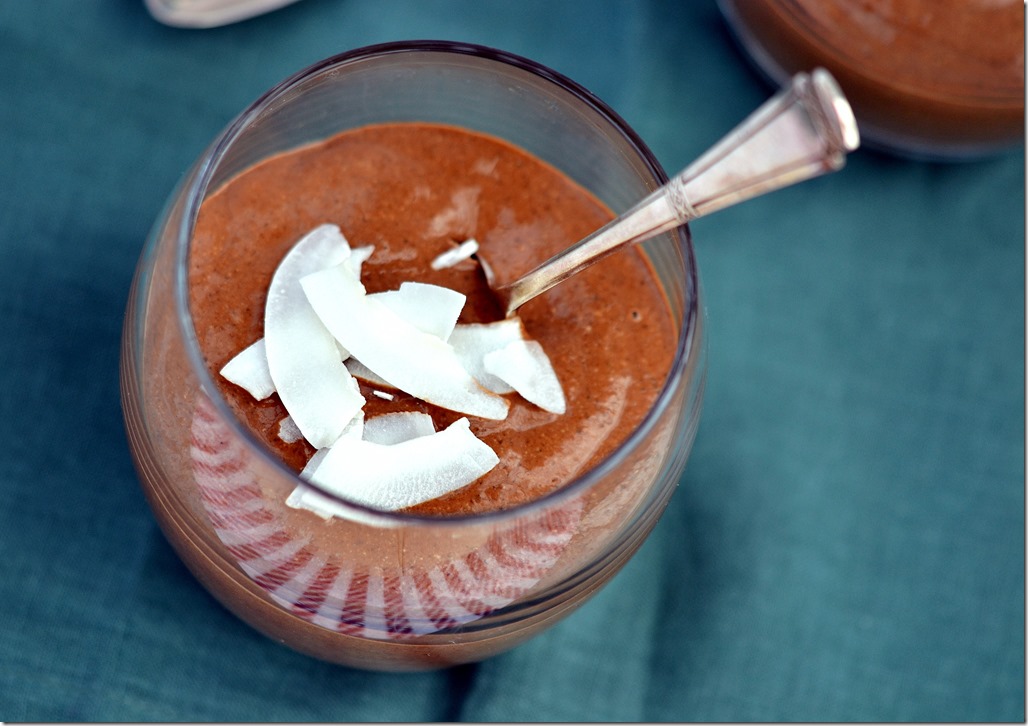
Creamy Carob Chia Mousse

Stopping by with a little weekend treat for you and an update on how things are going with me. If you read my Lemon-Coconut Fudge Bites post you’ll know I’ve been dealing with some health issues and have been on a mission to get to the bottom of them…

Creamy Carob Chia Pudding

Well, I’m pleased to be able to say that some of the problems have completely cleared up! I don’t know if it’s the result of the herbal and supplements prescribed by my naturopath that I’ve been taking, the anti-candida diet (no sugar, fruit, gluten, yeast, fungi, etc. ) that I’ve been following for nearly a month, getting lots of rest, or a combination of everything. Whatever it is, I’m just happy to be feeling so much better! I do still have a lingering problem which hasn’t left me yet but I’m feeling much more optimistic.

Now that’s me out of the way we can move on to something more fun- dessert!

Creamy Carob Chia Pudding

A few things have really helped me not feel deprived on this program, one of them being carob. It seems to have picked up a bad reputation as being a “health food” only eaten by those granola-munching hippie folk, or as an inferior substitute for chocolate. I want to encourage you to throw away those stereotypes and see it in its own right as just another tasty addition to your diet. I does bear some similarity to cocoa but it’s got a natural sweetness that cocoa doesn’t, it also doesn’t contain caffeine which is what makes it suitable for the anti-candida diet.

I guess I have been enjoying carob as a sort of replacement for my beloved dark chocolate. In the UK, Plamil Foods and Siesta both do unsweetened carob bars which are amazing! You can even get mint and orange flavoured ones! But, even if I COULD have chocolate right now I’d be eating carob too, along with this mousse!

Creamy Carob Chia Pudding

I’ve been enjoying chia puddings for some time now but was introduced to the idea of a blended chia pudding by Dreena Burton. The smooth texture is much more pleasant to me and transforms the pudding into a fluffy, thick mousse! With my newfound love of carob I had to make a carob version. Turns out I wasn’t alone in thinking this was a good idea and Adrienne of Whole New Mom also has a recipe which I’ve adapted here.

I’ve mostly been eating savoury breakfasts at the moment but enjoyed this yummy mousse one morning for a real treat Smile

Creamy Carob Chia Mousse:

(Adapted from Whole New Mom)

1 Can/ 1 1/2C “light” Coconut Milk
1/4C Chia Seeds
3 T (heaped) Carob Powder
1/2t Vanilla Extract
Pinch of Salt
2-3T Liquid Sweetener (Agave nectar, Maple Syrup, etc.) (I used 1T Yacon syrup + 10 Drops of Stevia as I’m still following the anti-candida diet)

If you don’t have a high-powered blender grind the chia seeds to a fine meal in a coffee grinder first. Then add all the ingredients to your blender and blend until very smooth. Pour into serving bowls and allow to sit in the fridge for at least an hour to thicken up before eating.

Serves 2-3

I’m sharing this recipe at the weekly link-up, Wellness Weekends.

Do you like carob? Have you actually tried it or are you basing your opinion on prejudice?!

If you’re new to Coconut and Berries, Please sign up for email updates and join me elsewhere: I’m on Facebook, Pinterest, Instagram (@coconutandberries), Google + and Twitter!

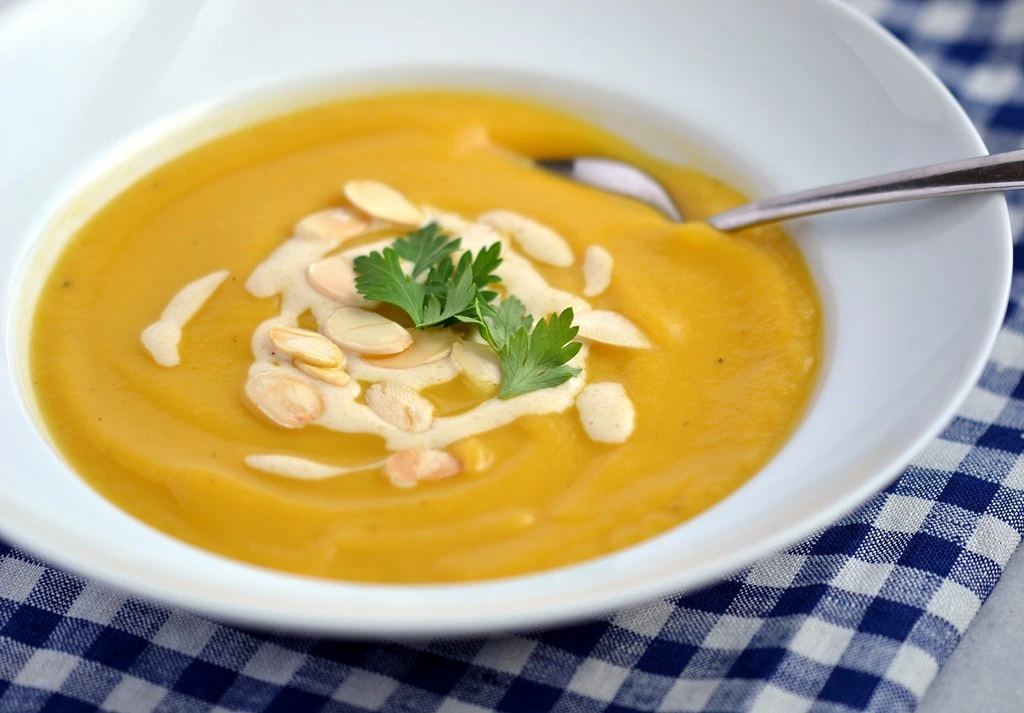
Simple Celeriac Soup

Hello again folks! The holidays are over and I’m back in my little flat in Bath awaiting exams and the start of the next semester. Between a bit of revision I’ve been keeping busy in the kitchen as usual…

Simple Celeriac Soup

Keeping it simple today with an easy-peasy soup to warm you up from head to toe. What is it about soup that is just so wonderful? It’s a miraculous thing how a few unexciting vegetables thrown together in a pot can produce something so tasty and nourishing! This soup is definitely more than the sum of its parts.

Simple Celeriac Soup

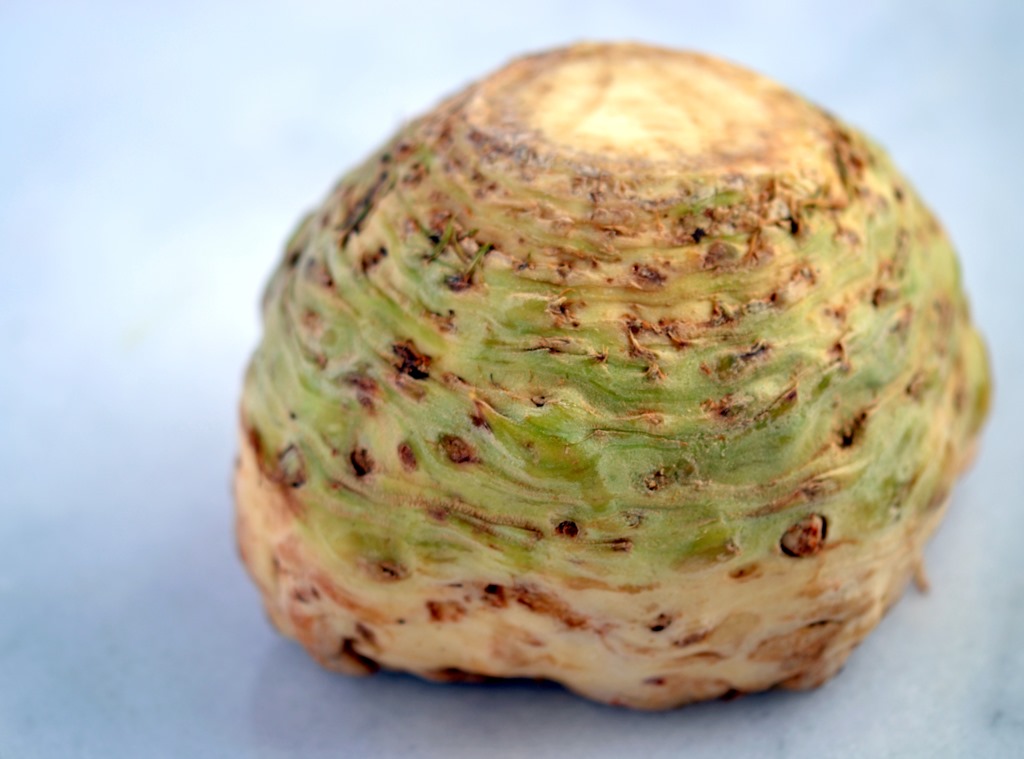
This is celeriac. Hmmm, not so attractive is it? You might have seen it whilst doing your food shopping and ignored it, or else just stopped and stared at it, marvelling at its ugliness. Either way, I bet it’s not made its way into many of your baskets.

Well I’m here to change that!

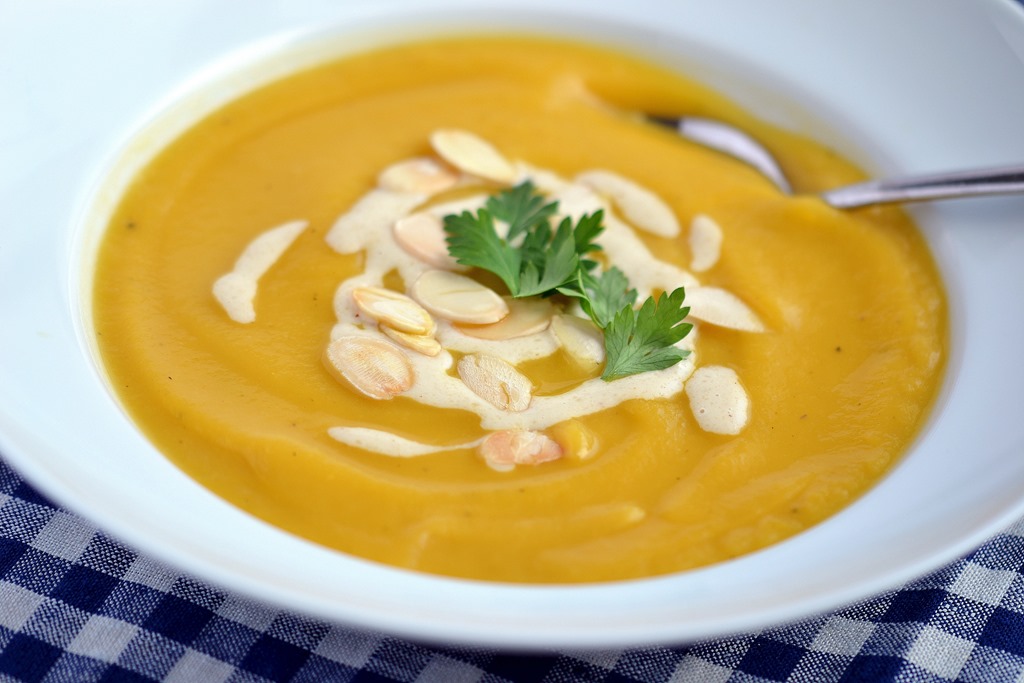
It may be lumpy and bumpy but it’s got a great flavour, both delicate and nutty, and works a treat as a base for soup. All it needs is some onion, carrot and garlic to add some sweetness, the essential salt and pepper, and that’s it. Throw it in a blender and you’ve got liquid velvet. Silky smooth and comforting.

Simple Celeriac Soup

I topped mine with a drizzle of almond cream, a smattering of toasted almonds and a sprig or two of fresh parsley but it doesn’t really need any adornment.

Simple Celeriac Soup:

1T Olive Oil
1 Small Carrot, diced
1 Medium Onion, diced
2 Cloves of Garlic, minced
Approx 500g/1lb Peeled and cubed celeriac
3-4C Vegetable Broth
Salt and Pepper to taste
Parsley, Toasted Almonds and Almond Cream* to garnish (optional)

* To make almond cream, blend together white almond butter OR blanched almonds with a little water and a splash of apple cider vinegar.

In a large pot over medium heat sauté the onions and carrots in the oil for 5-10 minutes until soft. Add the garlic and continue to cook, stirring for another minute or two. Add the celeriac and vegetable broth. Bring to boil then reduce to a simmer and allow to cook, covered for approx 15 minutes, or until the celeriac is soft. Allow to cool for a couple of minutes then, for best results, transfer to a high-power blender and blend until very smooth. Alternatively, use an immersion blender.

Return to pot, add salt and pepper to taste and warm through again before serving.

Serves 3-4

Simple Celeriac Soup

What’s in your soup pot at the moment?

If you’re new to Coconut and Berries, Please sign up for email updates and join me elsewhere: I’m on Facebook, Pinterest, Instagram (@coconutandberries), Google + and Twitter!

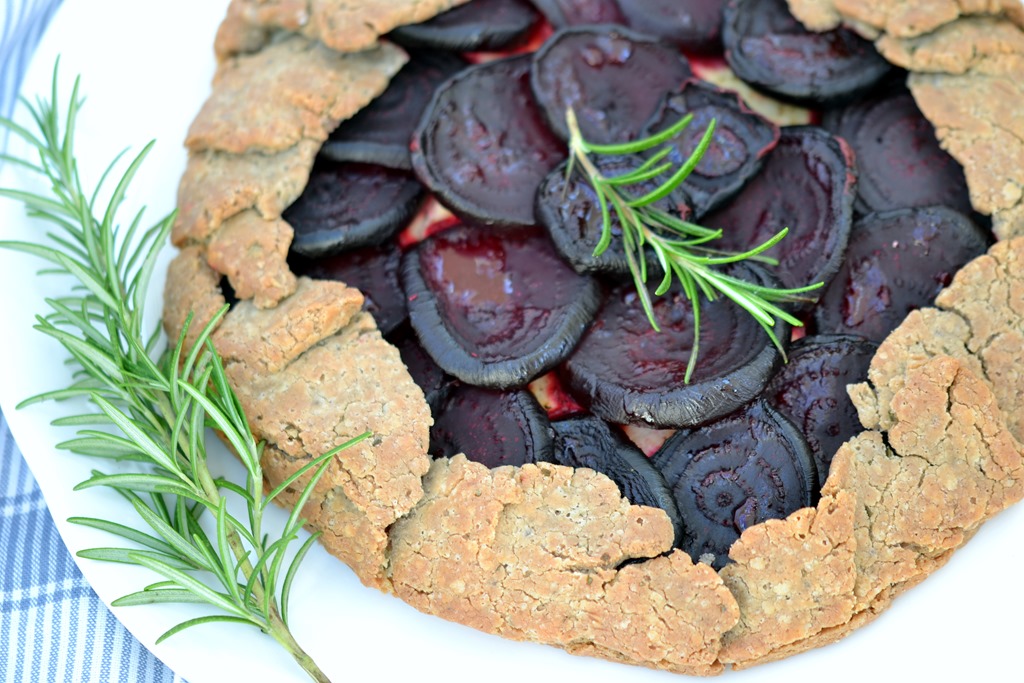
Rustic Beetroot Galette

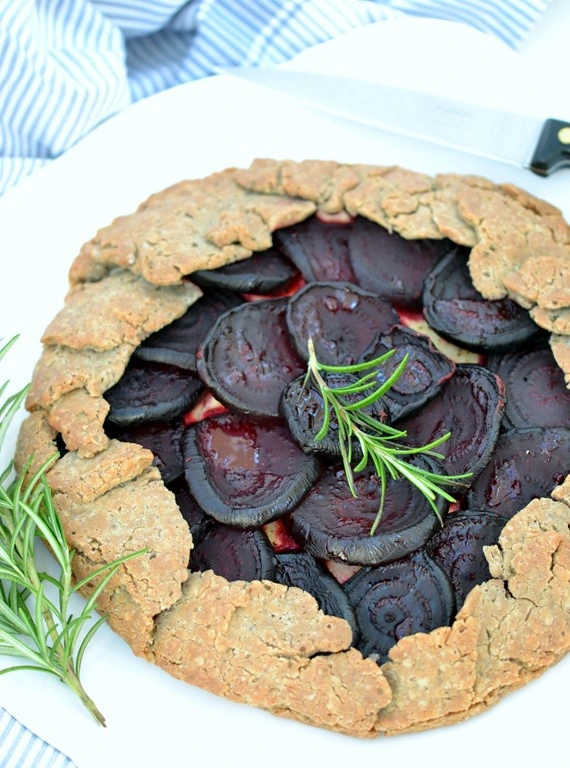
Rustic Beetroot Galette (GF, Vegan)

With Christmas and New Year madness all finished, I found myself with a few days of calm before heading back to university. Perfect for me to get back in the kitchen, or so I thought. Then we were met with rain, rain and nothing but. The dark skies meant there was no daylight for photo-taking which now discourages me from making anything fun as I always want to share successes on the blog.

Checking the forecast every hour (I’m a typical weather-obsessed Brit), a little sunshine spelled hope and I waited eagerly to seize those few short hours to snap some pics before the sky clouded over again.

Rustic Beetroot Galette (GF, Vegan)

Boy am I glad I did! I would have been upset not to be able to share this one with you as it’s definitely one of my favourites of the recipes I’ve featured on Coconut and Berries.

Rustic Beetroot Galette (GF, Vegan)

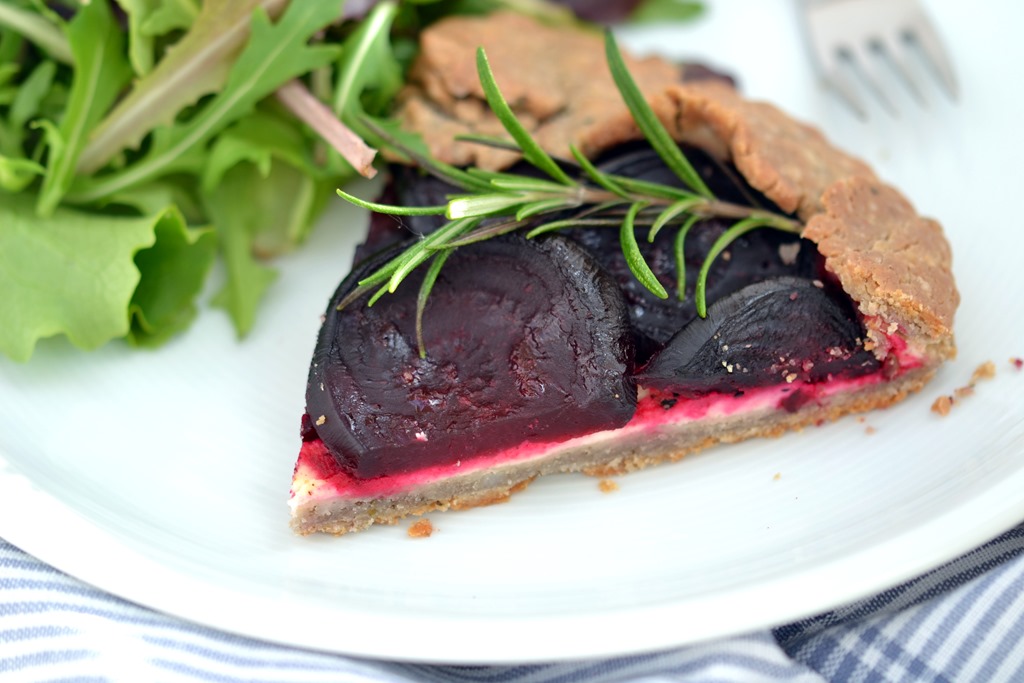
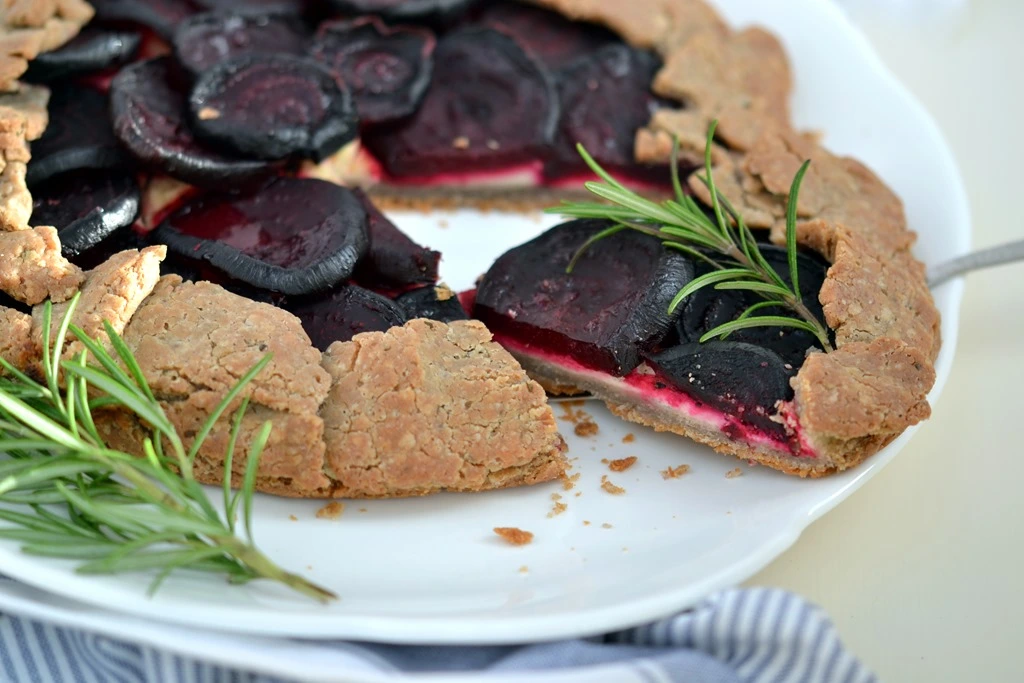
After the success of my Beetroot & Sweet Potato Salad with Baked Cashew Cheese I’ve been dreaming of pairing beetroot with a similarly creamy component but in a different form. I’ve always loved tarts and pies but am not so experienced with making crusts- though it is something I’d like to practice. A free-form tart or galette, intended to look “rustic”, suits my skills much better, and so that is what this became.

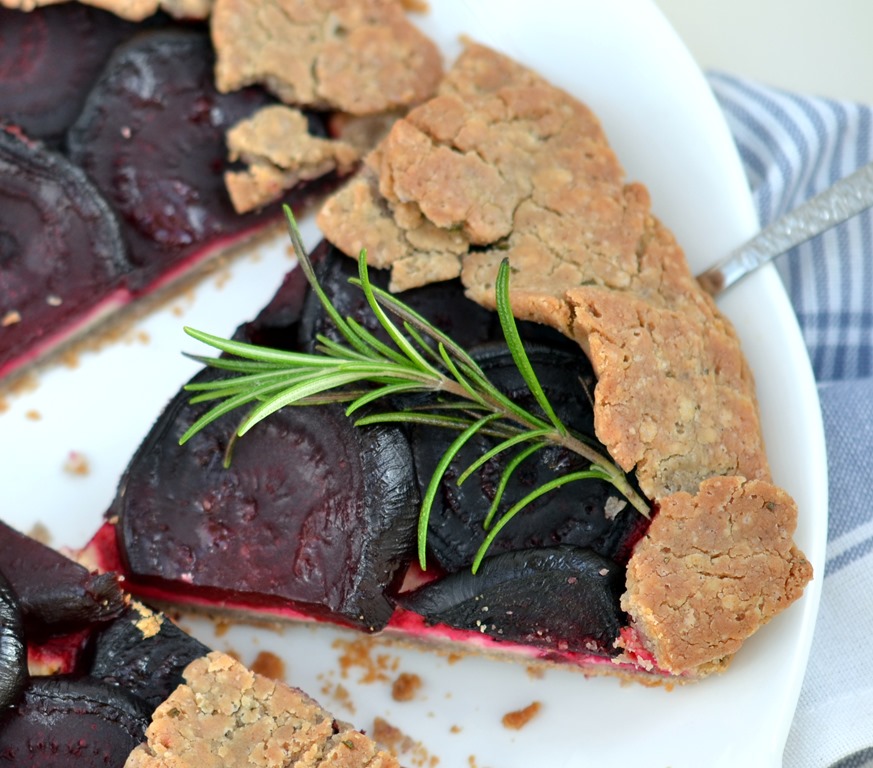
I was thrilled with how delicious the crust turned out . I used nutty buckwheat flour, flecked with rosemary and combined with coconut oil, and baked up it was oh so buttery and…just yum! This is definitely going to see many more fillings in the future.

My beetroot was roasted to bring out its natural sweetness and rounds laid on top of a creamy and tangy almond-based layer to make the perfect pie.

Rustic Beetroot Galette (GF, Vegan)

Rustic Beetroot Galette (GF):

Buckwheat Crust:

1 1/2 C Buckwheat Flour
1/2t Salt
1T Chopped Fresh Rosemary
1/2C/8T Cold Coconut Oil
3-5T Cold Water

Almond Filling:

3/4C Ground Almonds/Almond Flour
2T Lemon Juice
1/2t Salt
Pepper
1/4C Water

3-4 Medium Beetroot
1t Olive Oil

Roast the beetroot first. I use the tin-foil method– Scrub them clean, wrap loosely in tin foil and roast at 200C/400F for 45mins to 1 hour. Leave until cool enough to handle then peel away the skin using your fingers or a paper towel. The skin should peel away easily. Slice into rounds.

Blend all the ingredients for the almond filling until smooth. Set aside.

Make sure all your ingredients for the crust are cold. In a food processor combine buckwheat flour, salt and rosemary. Add the coconut oil in tablespoons and pulse to cut it in. Don’t over-process, a few larger pieces of coconut oil are fine. Add the water gradually and pulse until it comes together easily with your hands. Shape into a ball.

On a parchment lined baking sheet, roll out the dough into a large circle. Spread the almond filling over the crust, leaving a border of about 2 inches uncovered. Layer the beetroot rounds over the filling. Gently fold in the edges of the crust. Don’t worry if it breaks a little, just patch up the cracks with your fingers- it is quite delicate. Drizzle a teaspoon of olive oil over the beetroot and bake for 30-40 minutes until the crust is brown and crisp.

Leave to cool for 10 minutes before slicing.

Serves 4-6

I’m submitting this recipe to the weekly link-up, Wellness Weekends.

Rustic Beetroot Galette (GF, Vegan)

I hope some of you get to try this and love it as much as we did!

Do you have a favourite savoury tart/pie recipe?

If you’re new to Coconut and Berries, Please sign up for email updates and join me elsewhere: I’m on Facebook, Pinterest, Instagram (@coconutandberries), Google + and Twitter!
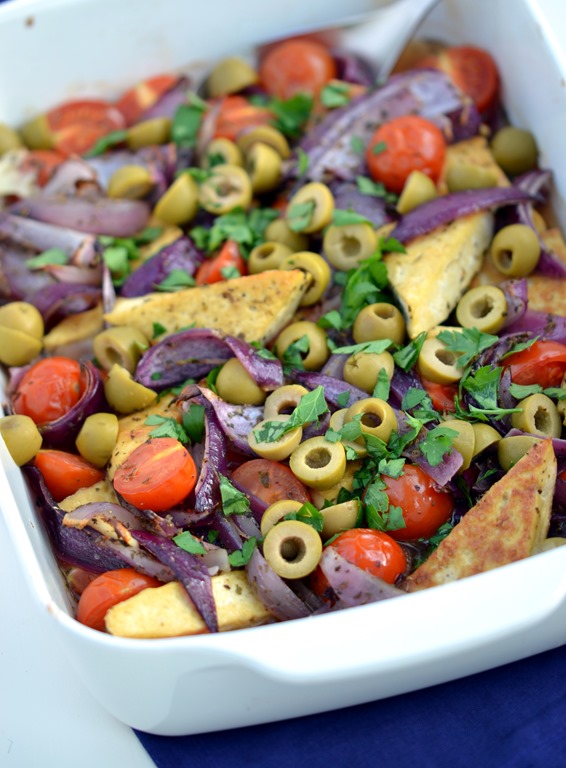
Tofu Agrodolce

Firstly, thanks for all your supportive comments on my dietary changes. I’m working with a wonderful naturopath and am optimistic that her suggestions are going to help me and that I’ll be able to loosen up the restrictions before too long.

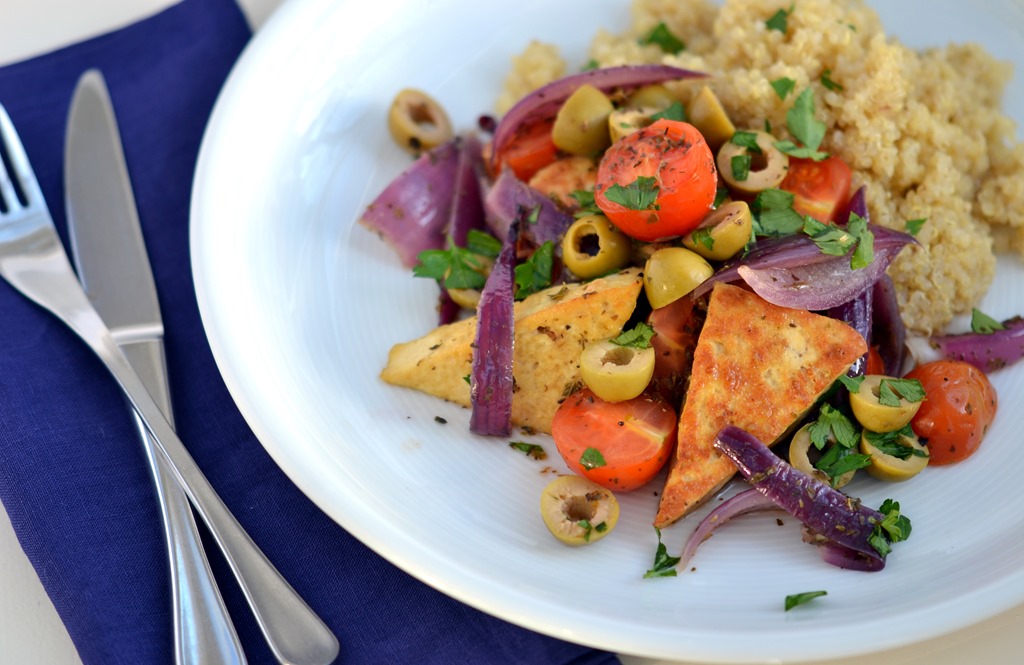
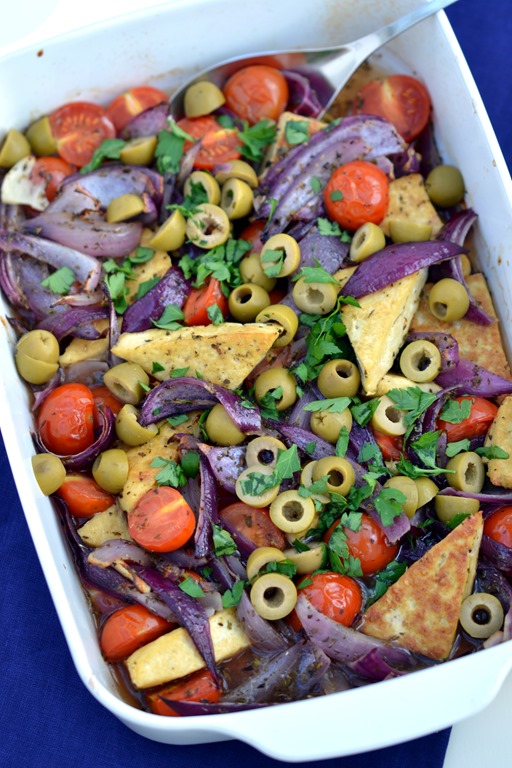
Tofu Agrodolce (Italian Sweet & Sour)

More so than ever, I’m looking for my meals to be full of goodness, and I’m sure many of you are of the “New Year, New Start” mentality and also seeking out especially nutrient dense foods. It’s turned cold and wintry again here though so warm, nourishing meals are more appealing to me than salads right now.

Tofu Agrodolce (Italian Sweet & Sour)

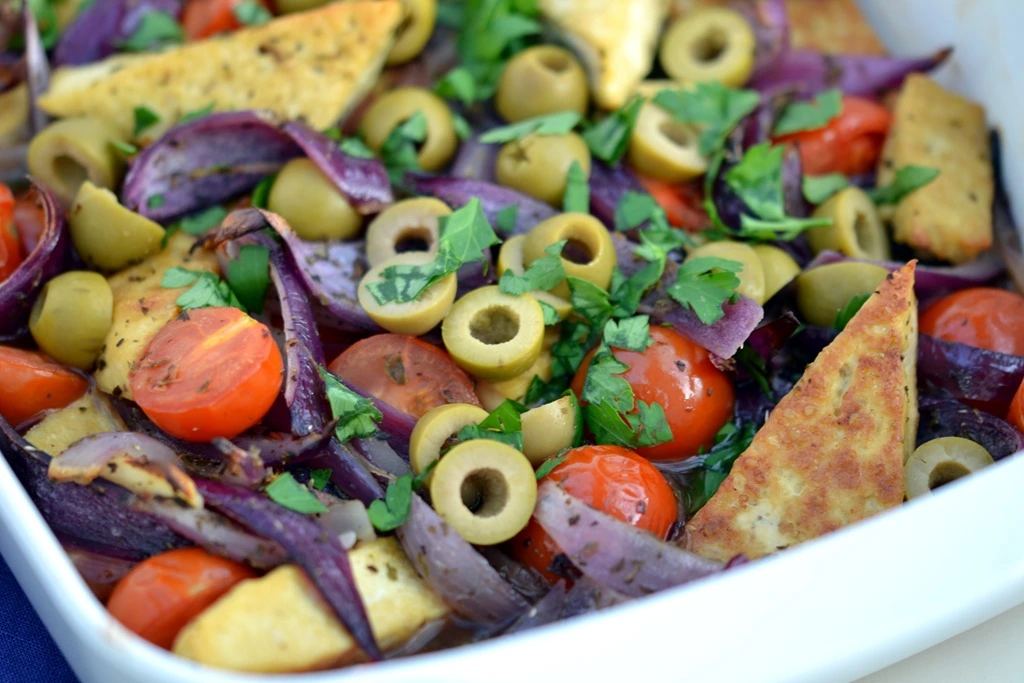
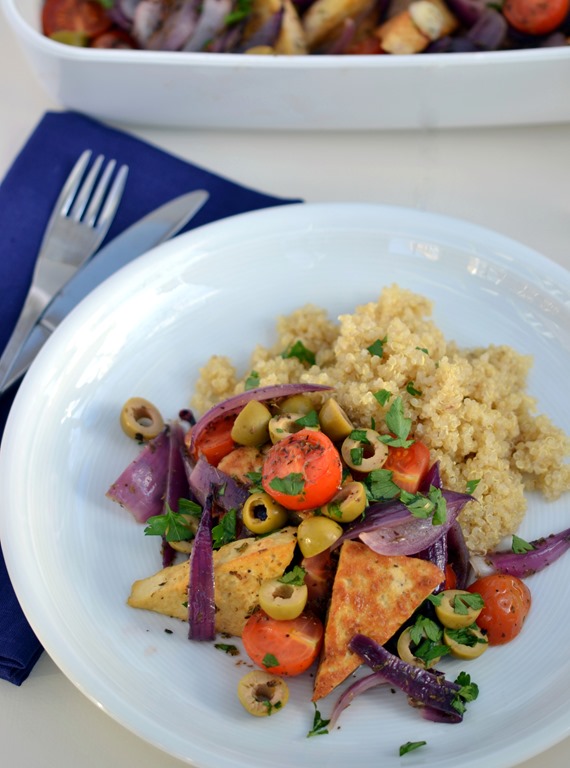
If you’ve been reading Coconut and Berries a while you’ll know that I’m a fan of exploring international cuisines from all over the world and also keen on languages. French and Spanish are my main languages though I do speak some Italian too.  “Agrodolce” is the Italian Sweet and Sour (“Agro”- Sour, “Dolce”- Sweet) but is a much subtler dish than the Chinese version, the gloopy dish which I’ve experienced in rather inauthentic Chinese restaurants anyway. Its sweetness comes from the tomatoes and red onions, enhanced only a little by a touch of sugar, and is complemented wonderfully by the briny olives and slight tang from the vinegar.

Tofu Agrodolce (Italian Sweet & Sour)

Unsurprisingly I suppose it’s traditionally a chicken or lamb dish, but I opted for tofu for a meat-free version. You could try tempeh or chickpeas for a variation too. It’s an easy weeknight dinner which comes together in less than 30 minutes, rounded out with a simple side salad and quinoa or couscous.

Tofu Agrodolce (Italian Sweet & Sour)

Tofu Agrodolce:

1 350g/12oz Block of Firm Tofu, Drained, Pressed and cut into triangles or cubes *
1T Olive Oil (Divided)
1T Tamari
250g/8oz Cherry Tomatoes, halved
2 Medium Red Onions, cut into wedges
2 Cloves of Garlic, thinly sliced
1C Vegetable Broth
1T Dried Oregano
1 1/2t Agave Nectar OR Coconut Sugar (OR other sweetener of your choice)
2t Red Wine Vinegar
2/3C Pitted Green Olives, Drained & Sliced
Handful of Chopped Parsley

Dry-fry the Tofu over medium heat, flipping until both sides are golden brown and crisp. Set aside and toss with 1/2T olive oil and 1T tamari in a large oven-proof dish. Leave to sit until needed.

Preheat the oven to 200C/400F.

Add the remaining 1/2T oil to the pan over medium-high heat. Add the red onion and garlic and cook, stirring, for 5 minutes. Stir in the oregano, sweetener, vinegar and stock and bring to the boil. Pour over the tofu, along with the halved cherry tomatoes.

Bake for 15-20 minute, basting halfway through cooking time, until the liquid is slightly reduced. Scatter with the olives and parsley. Serve with quinoa or couscous.

Serves 3-4

* Try chickpeas or tempeh instead of the tofu for a variation.

Tofu Agrodolce (Italian Sweet & Sour)

Hope 2014 has got off to a good start for everyone!

If you’re new to Coconut and Berries, Please sign up for email updates and join me elsewhere: I’m on Facebook, Pinterest, Instagram (@coconutandberries), Google + and Twitter!
Best of 2013 on Coconut and Berries!

I couldn’t let New Year’s Eve pass by without recapping this past year!

Best of 2013 Collage

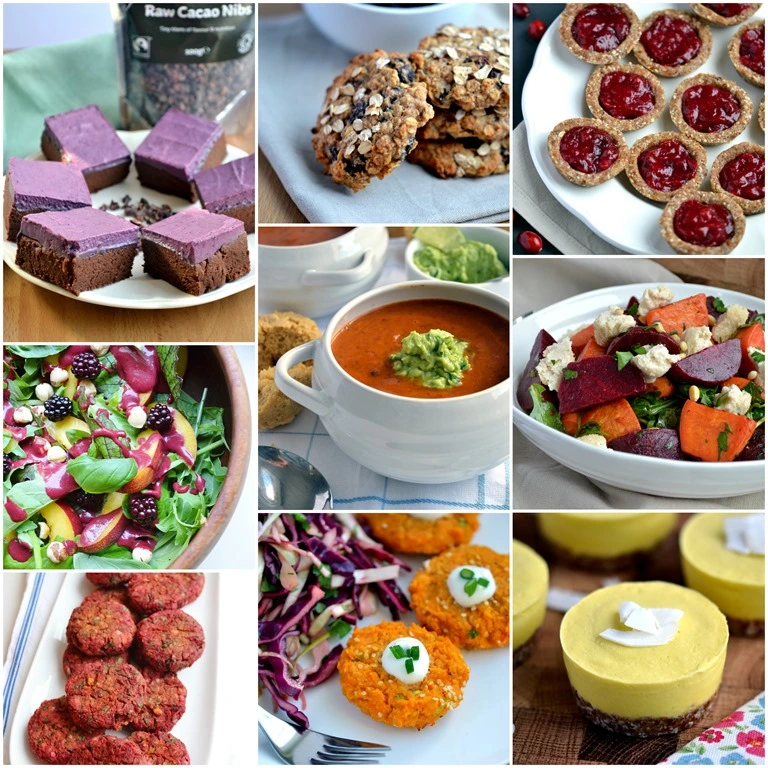
I started Coconut and Berries this summer so these recipes are not only your favourites of 2013 but your favourites of all my recipes so far. I’ve already said multiple times how happy I am to have created this little space on the web. I get so much out of cooking, photographing and writing for the blog and even more from connecting with all my readers. Thank you so much for all your support and I hope you continue to enjoy reading in 2014. I’ve got a few exciting things planned so please stay tuned!

Now for your favourite recipes:

DSC_0346

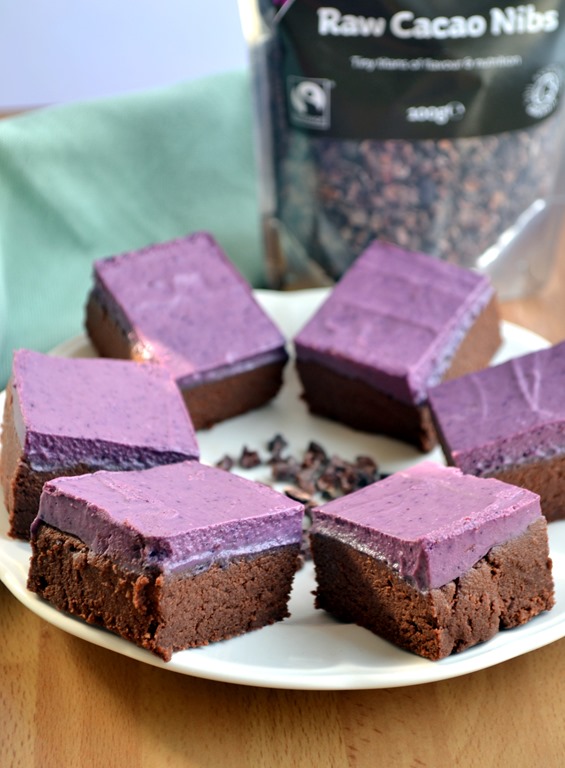
1. Raw Berry Cream Brownies– I’m so pleased that this was no.1- not only because I loved it too but because it combines coconut and berries so is perfect for my signature blog recipe Smile

DSC_0420

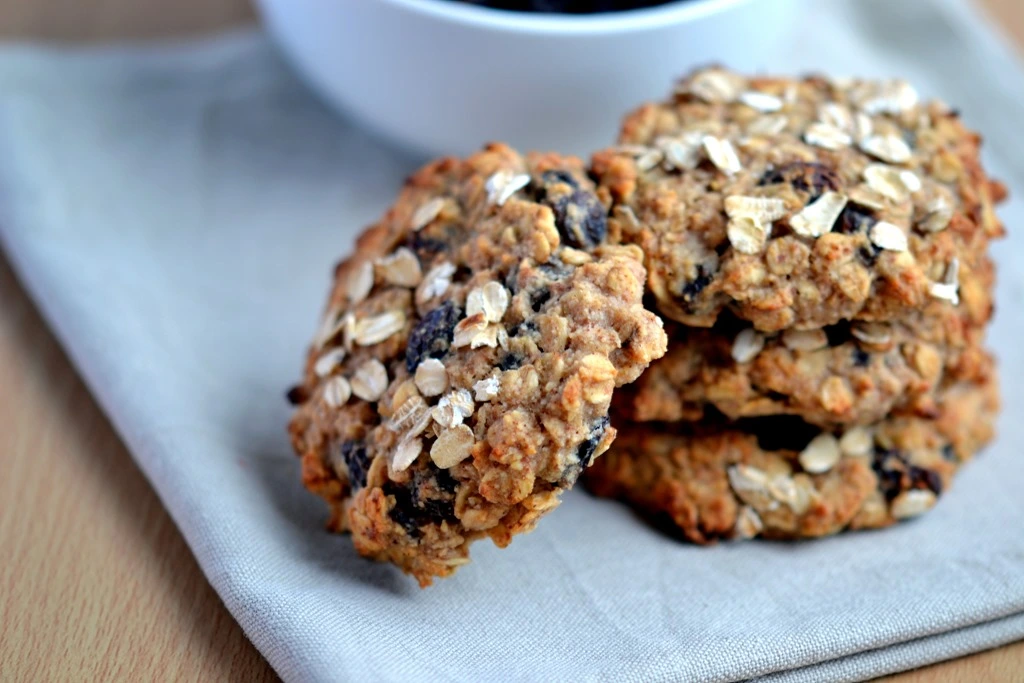
2. Apple & Raisin Oaty Breakfast CookiesThis one proved popular too and a lot of you have come back and told me you’ve made and enjoyed it. Do please let me know if you ever make my recipes. Your feedback is always welcome.

DSC_0286

3. Healthy, No-bake Cranberry Jam Tarts– Another recent recipe. I really enjoyed putting this one together and discovered a new favourite cranberry sauce in the process. Perfect with anything and everything!

DSC_0162

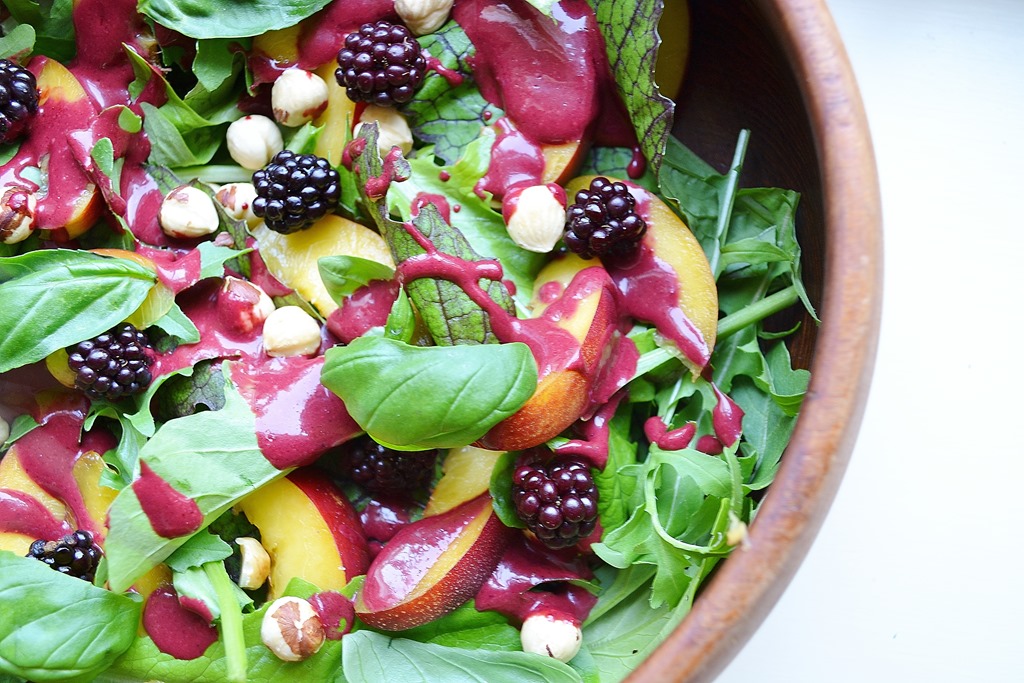
4. Nectarine Salad with Blackberry Dressing, Basil & Hazelnuts– My favourite summer salad! It’s a long way to go before stone-fruit season’s here again but when it is I look forward to revisiting this recipe.

DSC_0050.1

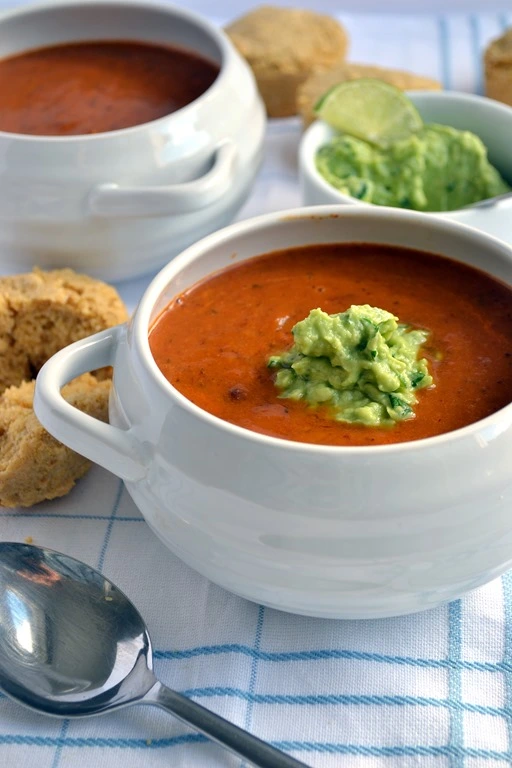
5. Chili-Bean Soup with Avocado Lime Cream– I loved this soup! A really easy one and definitely quick enough for a weeknight.

DSC_0289

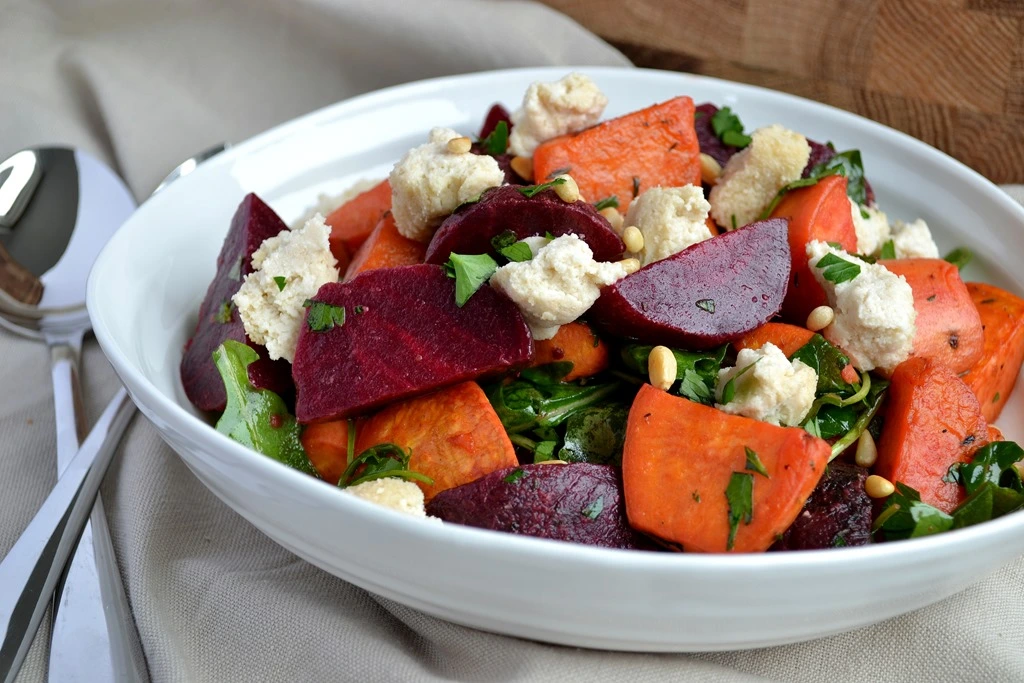
6. Beetroot & Sweet Potato Salad with Baked Cashew Cheese A lot of you hadn’t tried baking nut cheese to get a firmer texture, perfect for crumbling over salads. Nice to be able to teach you something new.

Baked Beetroot Falafel

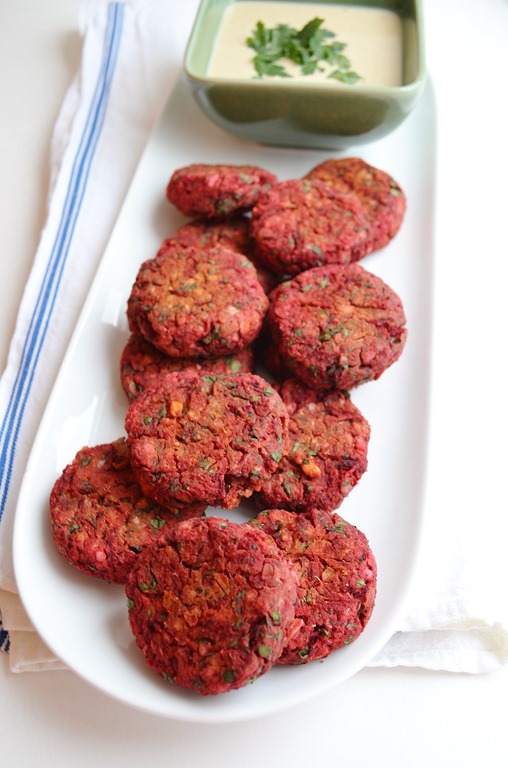
7.Baked Beetroot Falafel- I’m ashamed to admit I haven’t made these since posting the recipe! It’s fun to do this roundup to remind myself of old recipes I enjoyed. I was lucky enough to get a Magimix food processor for Christmas so maybe these falafel should be the first thing I make with it!

DSC_0340

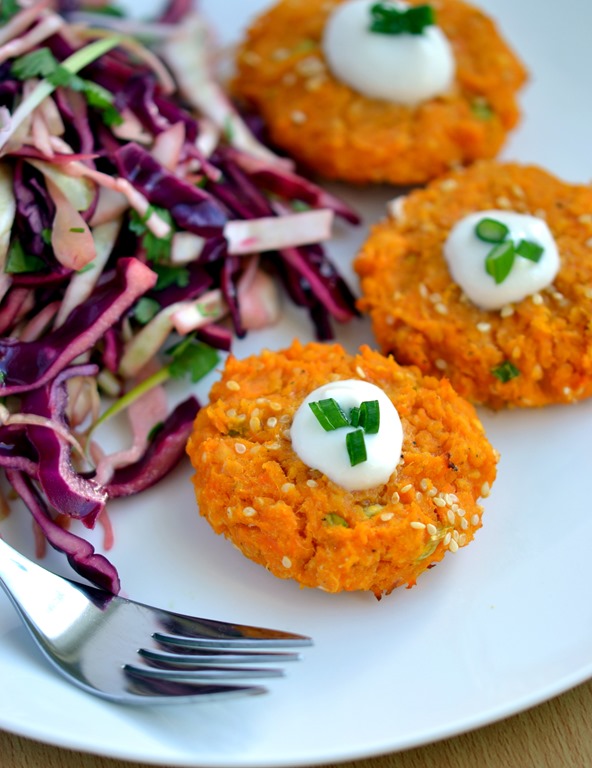
8. Sweet Potato, Red Lentil & Sesame Patties with Red Cabbage SlawThe happy result of an experiment, you loved these cute little sweet potato cakes. Slaws are my favourite thing to make with cabbage. Check out my Cabbage, Apple & Pomegranate Salad with Ginger-Almond Dressing too.

DSC_0024

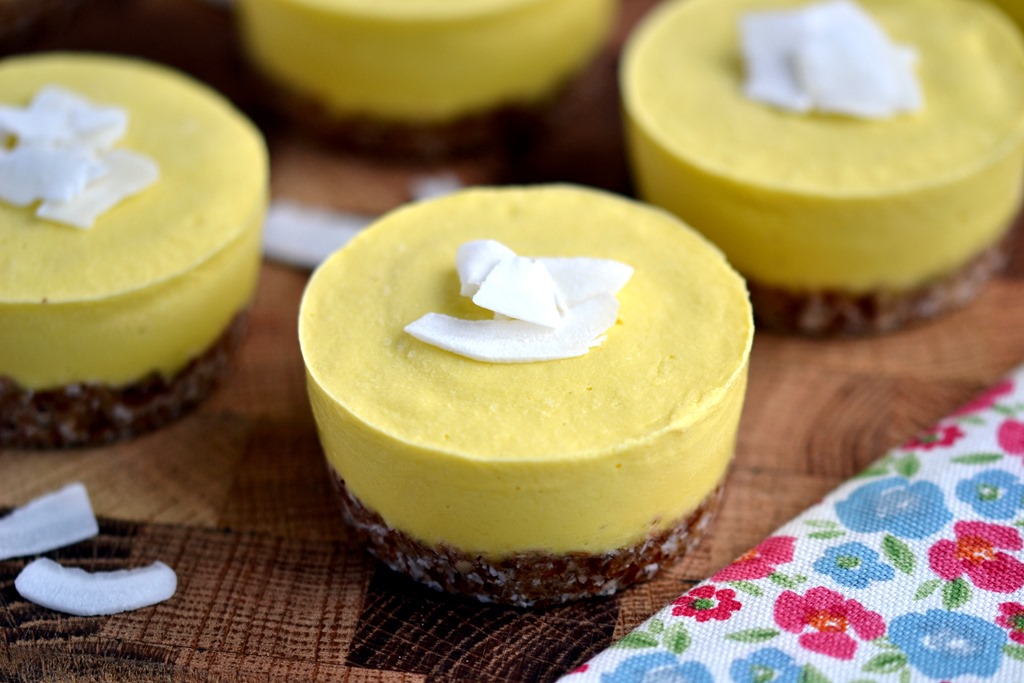
9. Raw Mango Coconut TartletsAnother one from the summer. I actually made these again recently and they were just as tasty as I remembered. I got a chance to retake the pictures too as my photography has improved over the months of practice!

2013 was an exciting year for me, not only blog-wise but on a more personal level too. A few highlights:

– I visited Berlin for my 23rd birthday back in April

– I took my finals and graduated. 4 years of university (3 years at Oxford and 1 year living in Paris and Barcelona) were not without their challenges but I’m proud of how far I’ve come and am grateful for both the ups and downs.

– This summer I visited Wales and Scotland for the first time! I’ve hardly seen any of the UK for someone who’s lived here all my life!

– I moved to Bath to start my Masters.

I’m excited for 2014 and whatever it brings. This year will see me (hopefully!) finish my studies and embark on a career! Wherever I am this time next year I hope Coconut and Berries is still bringing me as much happiness as it is now!

Happy New Year!

If you’re new to Coconut and Berries, Please sign up for email updates and join me elsewhere: I’m on Facebook, Pinterest, Instagram (@coconutandberries), Google + and Twitter!
Lemon-Coconut Fudge Bites

Hello again everyone! I’ve missed posting here this last week but wanted to take break and disconnect completely over Christmas. Hope you all had a lovely holiday wherever you are in the world. Things are gradually getting back to normal here, although I’ve still got a week before I head back to my little flat in Bath for the next semester.
Lemon-Coconut Fudge Bites

I may be one of the few who wasn’t eating cookies and desserts aplenty over Christmas, but I promise I’m definitely not feeling smug about it! I would have loved to be eating chocolate and Christmas pudding like everyone else. But I haven’t been feeling my best for a little while now and so I’ve been trying out an anti-candida diet to hopefully bring me back to balance. The diet doesn’t allow any sugars (the only sweeteners I can use are yacon syrup and stevia), including those from fruit,  as well as gluten, dairy, yeast, fungi and a bunch of other things.

For a major sweet tooth like me it has to be said it was a bit of a challenge figuring out what to eat, especially when it came to finding a replacement for my daily post-lunch dark chocolate fix.

Lemon-Coconut Fudge Bites

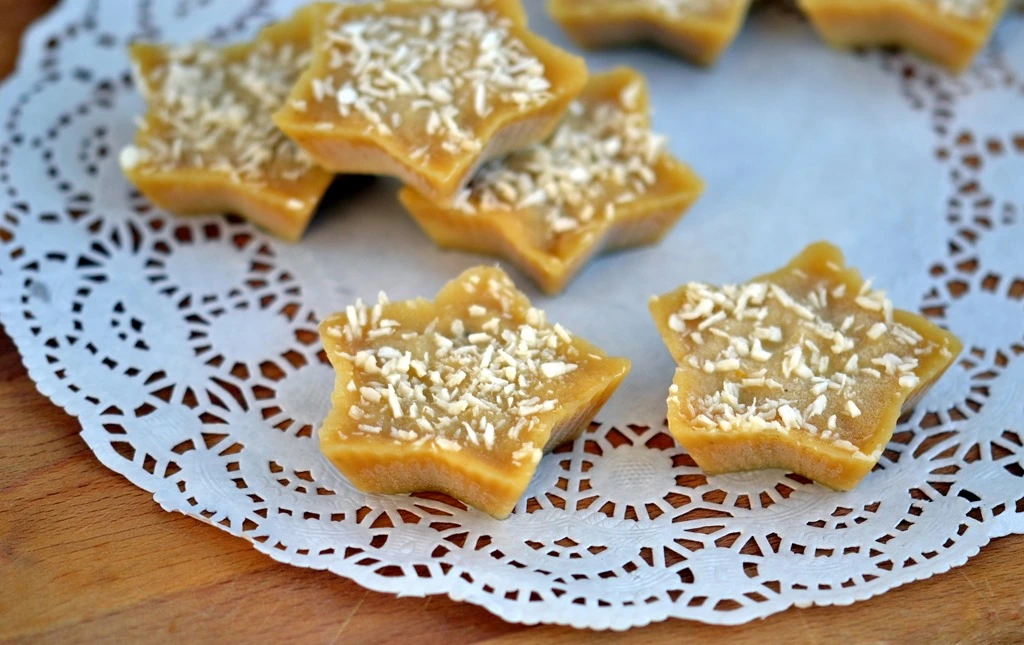
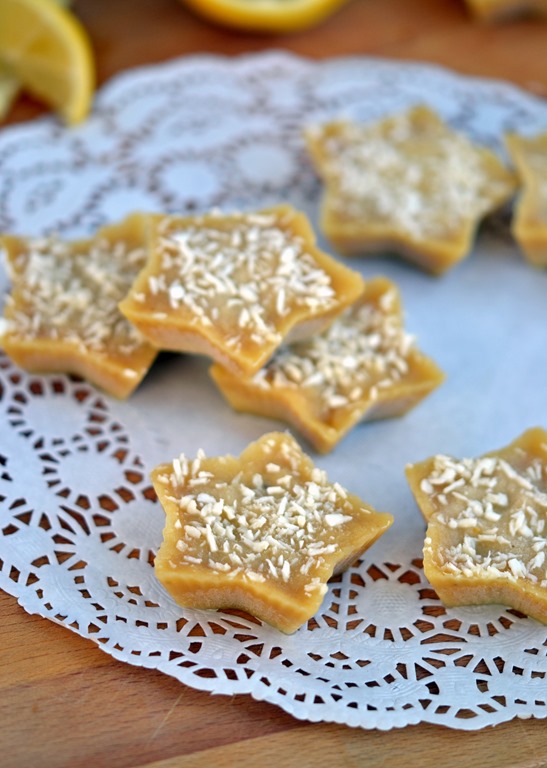
These zingy little fudge bites are doing the trick of satisfying any sweet cravings nicely, and one is more than enough as they’re pretty rich from the coconut and almond butters.

After chocolate Lemon desserts are always my favourites anyway…

Lemon-Coconut Fudge Bites:

1/2C White Almond Butter OR Cashew Butter
3T Melted Coconut Butter
Zest of one Lemon
3T Lemon Juice
1 1/2T Liquid Sweetener (Agave nectar, Brown Rice Syrup etc.) I used 1T Yacon Syrup + 5 drops stevia
Shredded Coconut for sprinkling

Add all ingredients to a glass bowl, except the shredded coconut, and stir well to combine. Divide between 10 mini silicone moulds OR pour into a dish lined with parchment paper and slice into cubes once set. Sprinkle with shredded coconut and freeze until firm.

These are the perfect consistency straight from the freezer, in the fridge they’re a little too soft for my tastes.

I’m submitting this recipe to the weekly link-up, Wellness Weekends

Lemon-Coconut Fudge Bites

Today I’ve actually discovered there might be another cause of my health problems so I’m praying that’s the case and I can go back to eating normally soon!

In the meantime, what are your favourite  SAVOURY snacks?

If you’re new to Coconut and Berries, Please sign up for email updates and join me elsewhere: I’m on Facebook, Pinterest, Instagram (@coconutandberries), Google + and Twitter!